Integrations
Manage and configure your API keys for secure access to FlexPay’s services.
The Integrations page allows you to manage your API keys, which are crucial for authenticating and interacting with FlexPay’s services. From this page, you can generate new API keys for both Production and Sandbox environments, view existing ones, and delete keys that are no longer needed. These keys ensure your integration with FlexPay remains secure and functional. If a key is missing or incorrect, you will receive a 401 authentication error, indicating that the request was not properly authorized.
Create API key
As an Account Administrator, you can add API Keys to your FlexPay account. To add a new key, follow these steps:
- Log in to the Client Portal and navigate to Account Settings > Integrations.
- Click GENERATE API KEY
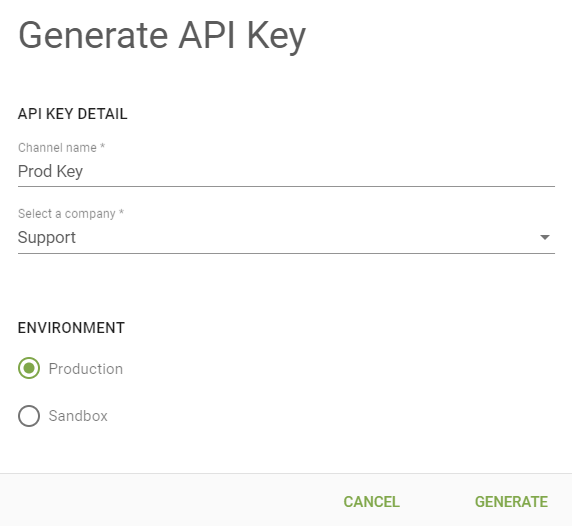
- Enter a name for the key, select the Company to associate with it, and choose the environment mode.
- For more details on testing with FlexPay, refer to our Sandbox Guide.
- Click GENERATE.

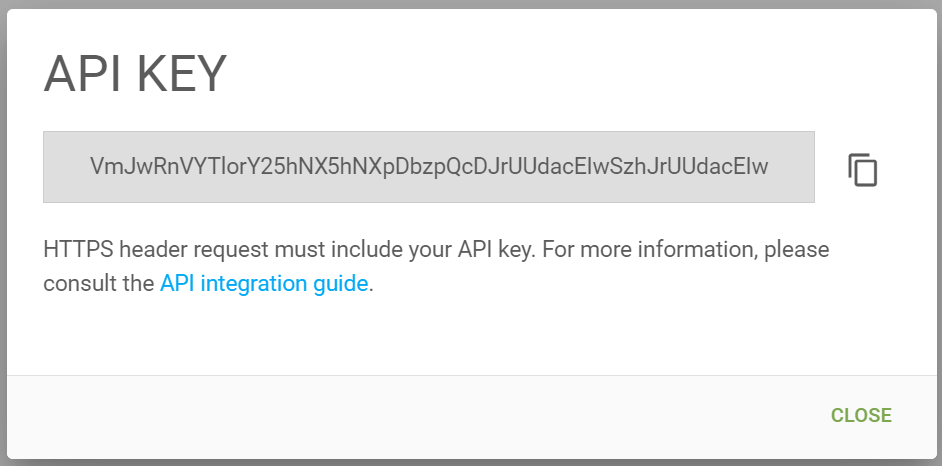
A unique API key will be generated. Be sure to save it in a secure location immediately after it's created. Once you close the window, you will no longer be able to retrieve the key from the portal. Use the Copy icon to save it to your clipboard before closing.

Note
If using the Gateway Management API, a Sandbox key will only be able to create gateways in that Mode. Any transactions sent to a sandbox gateway will never reach a production endpoint. For more information, please refer to our API documentation.
Delete API key
If you need to delete a key from your account, please follow these steps:
- Log in to the Client Portal and navigate to Account Settings > Integrations.
- Find the API key, then click the three dots on the right side of the screen to open the options menu and select Delete.
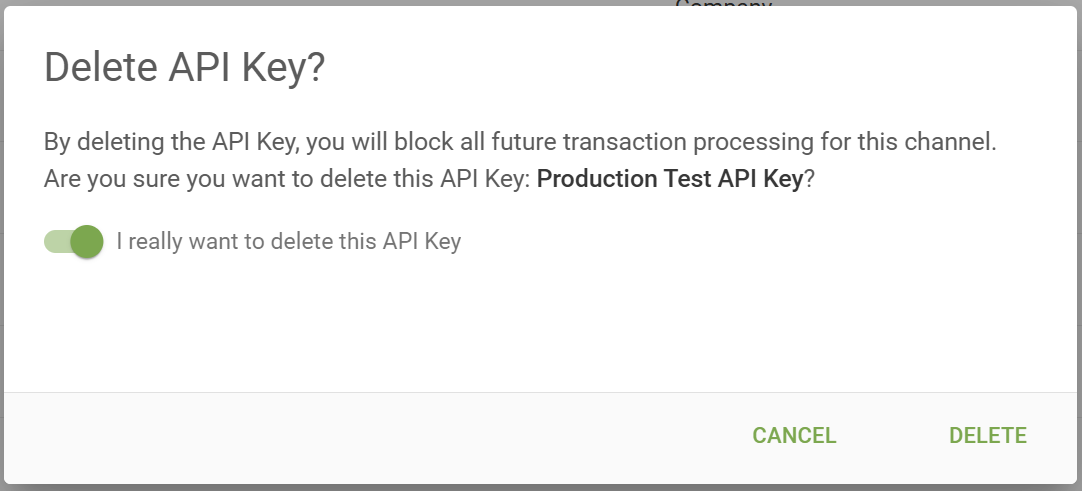
- In the confirmation screen, toggle the option "I really want to delete this API Key", then click DELETE.

Once an API key is deleted, any transactions sent using that key will fail and return a 401 authentication error.
FlexPay Retries
If your account has been configured to leverage FlexPay's scheduler (see Enterprise with Scheduler Integration), the "FlexPay Retries" tab will also be available in the Integrations section.
Please note that FlexPay retries can only be enabled once per Company/Environment combination. This means that if you only have the Default Company set up in your account, you'll be able to add the scheduler twice, one for Production and one for Sandbox.
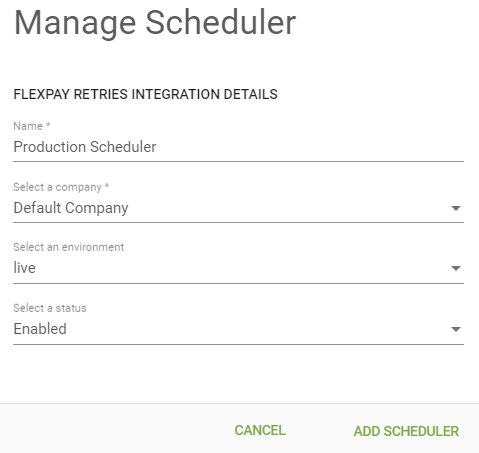
To configure it, simply click ADD SCHEDULER. In the modal window, enter a name, and select a company, environment, and status. Click ADD SCHEDULER

Important
As soon as the Scheduler is enabled for a company, any transaction sent will be automatically scheduled and retried by FlexPay. Do not enable it if your CRM is also scheduling and processing retries.
Updated 11 months ago
